Add Integrations
The Integrations page defines which external tools connected to your Snowflake account you want Yuki to optimize. For each tool (dbt, Airflow, BI tools, etc.), you specify the Snowflake warehouses it uses and the Snowflake users it runs as.
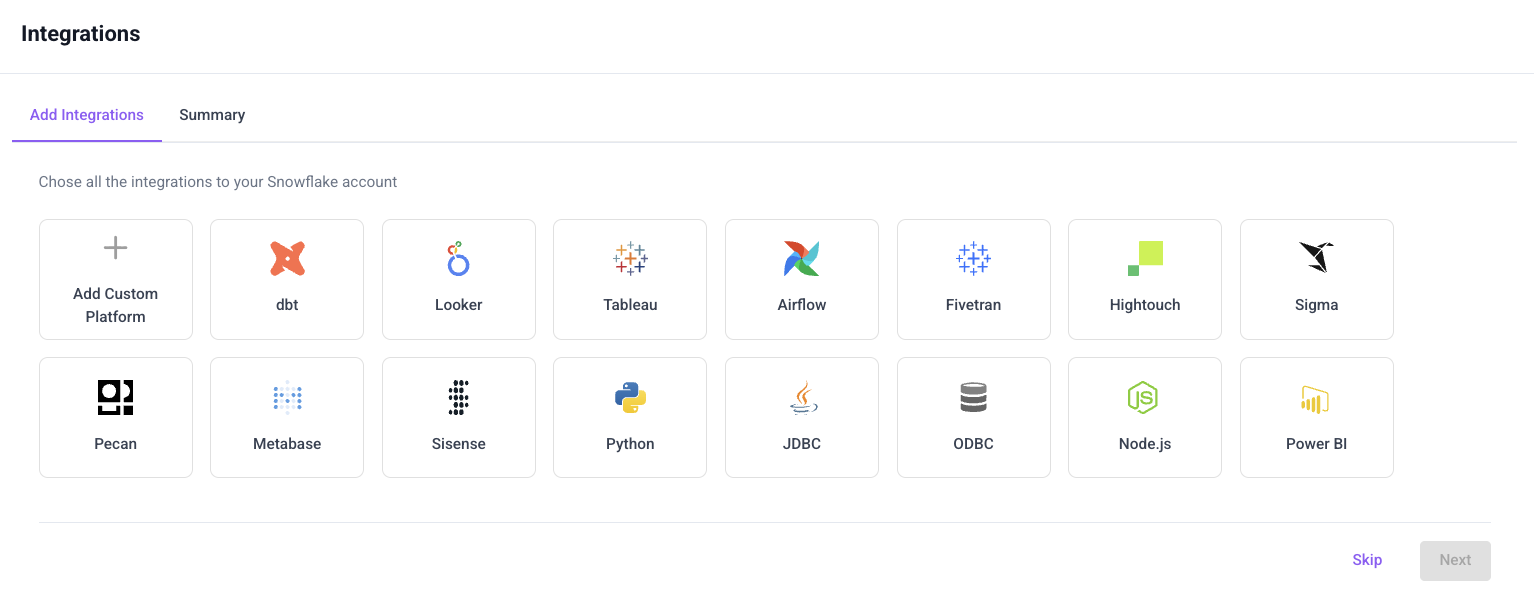
Step 1 - Choose Integrations
Select the tools connected to your Snowflake account that you want Yuki to optimize - dbt, Looker, Airflow, JDBC, and other common data platforms. Click a tool to start configuring it.
If your tool doesn't appear in the list, select Add Custom Platform.
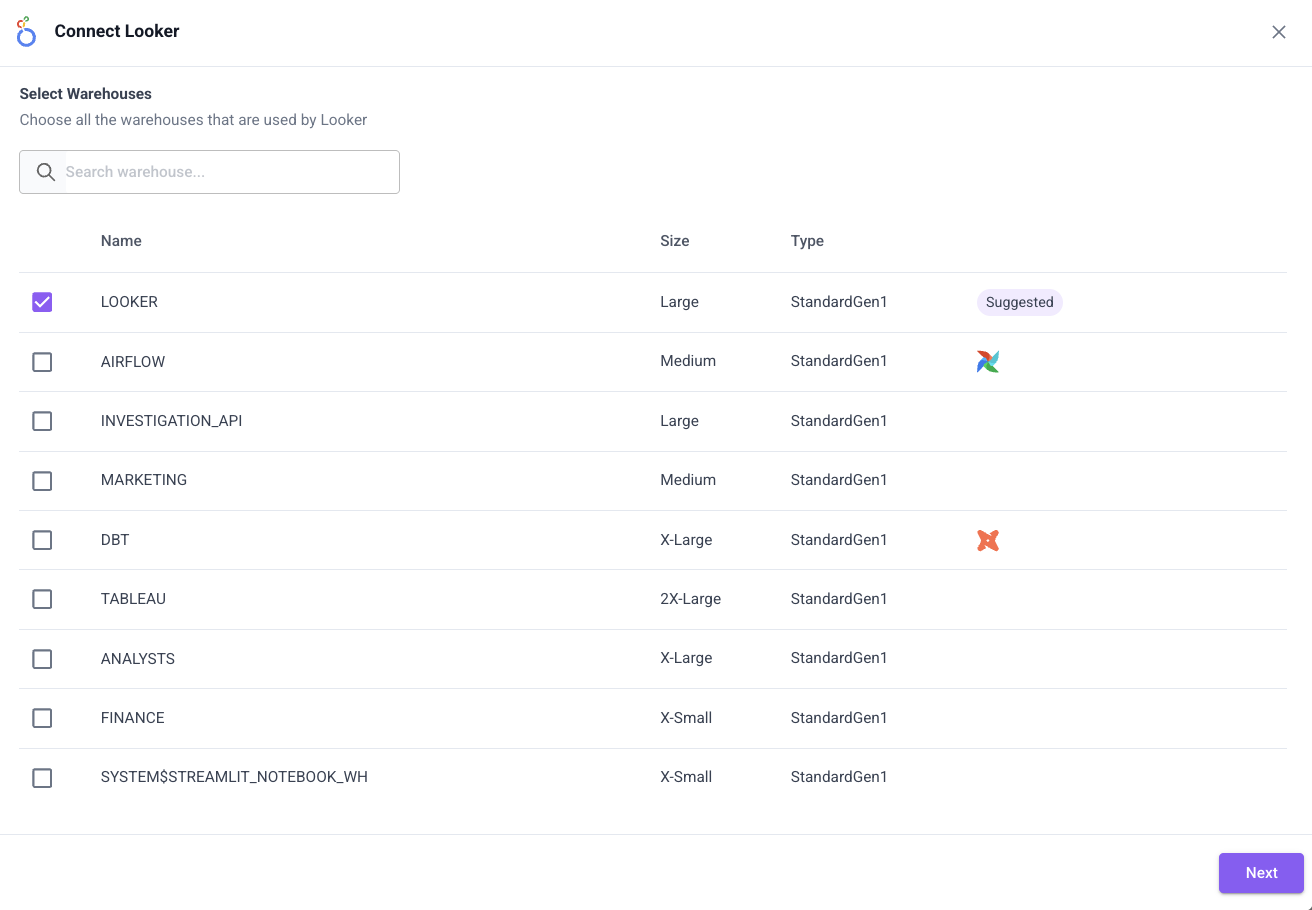
Step 2 - Select Warehouses
For each tool, Yuki shows all Snowflake warehouses in your account. Select the warehouses that this tool uses to run queries. Once selected, these warehouses are automatically optimized by Yuki.
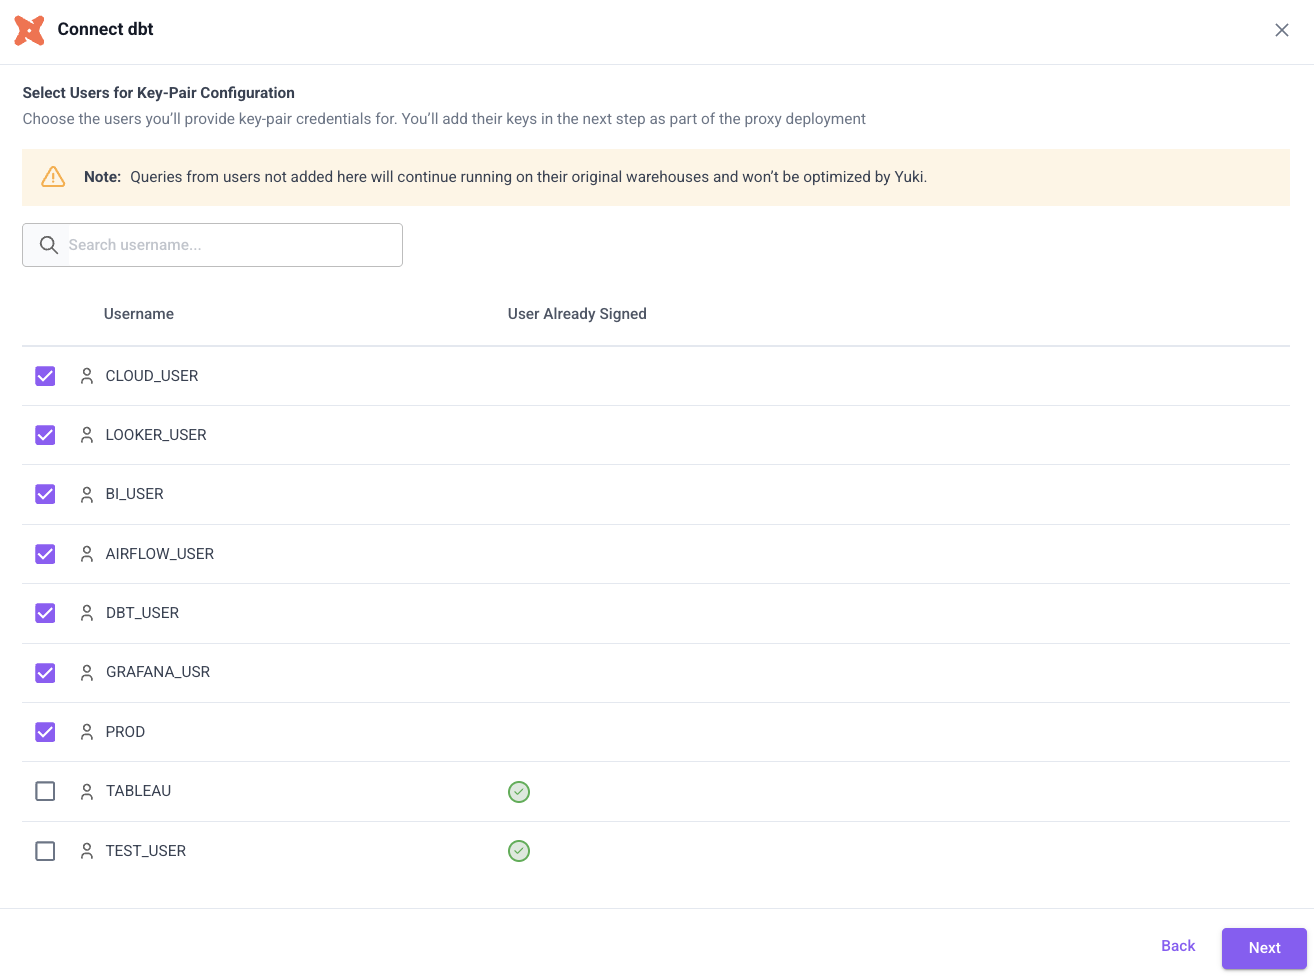
Step 3 - Select Users
Select the Snowflake key pair users that this tool uses to authenticate to Snowflake. Only queries executed by the selected users will be routed through Yuki.
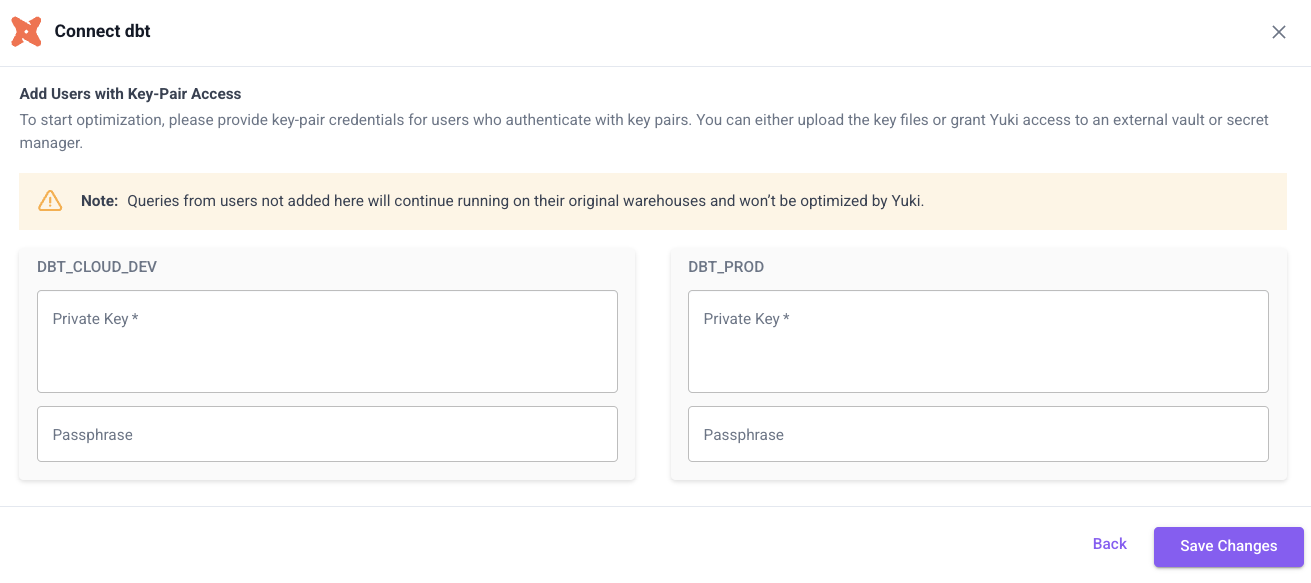
Step 4 - Provide Key-Pair Credentials
This step applies only to service users authenticating via Key Pair Authentication. Users with password, PAT/token, or SSO authentication can skip this step. For Hybrid/Private deployments, do not upload keys here - provide them during Yuki Proxy installation.
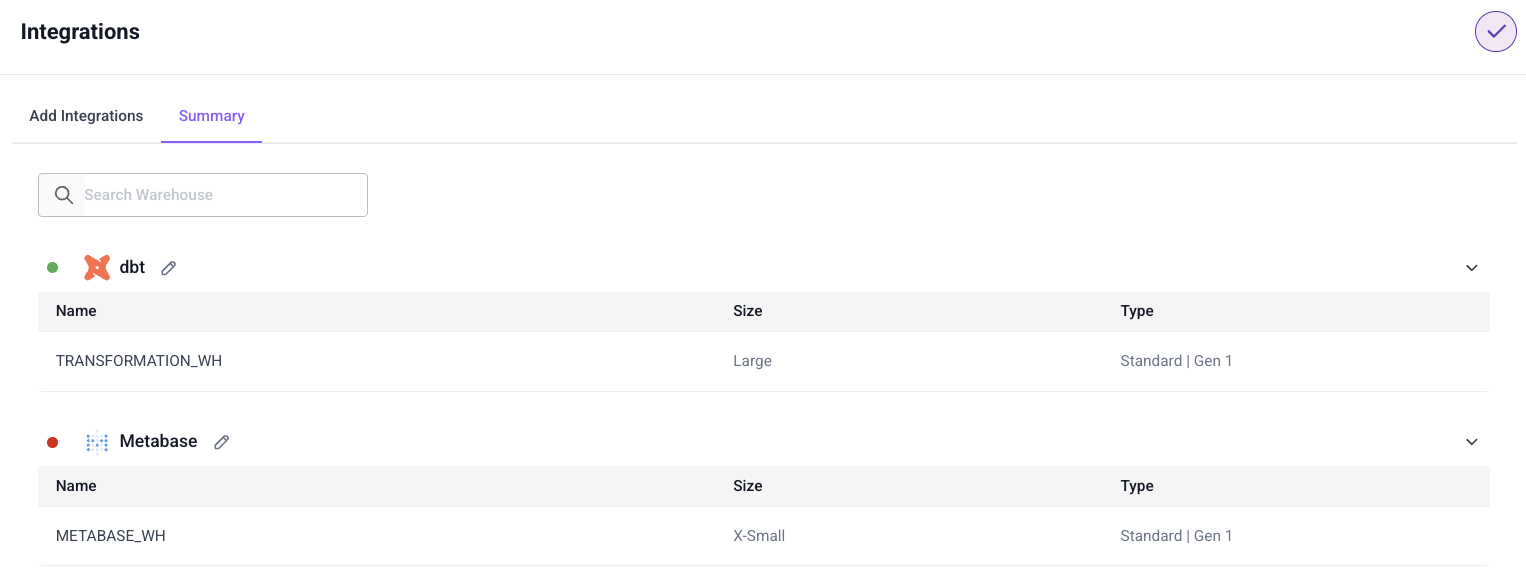
Step 5 - Summary
After a tool is connected, it appears in the Summary view showing:
- Which warehouses are assigned to each tool
- Their size and Snowflake generation
- Whether Yuki has the required credentials to optimize queries for that tool
What Happens Next
Once complete, Yuki has the information needed to start routing and optimizing queries. Yuki will create and manage its own Snowflake warehouses for running optimized workloads. You can update your integrations at any time.
Next Step
Proceed to Configure Permissions.