Connect Snowflake Cortex Agents (MCP)
Yuki exposes its optimization layer as an MCP (Model Context Protocol) server. Once connected, Snowflake Cortex Agents can call Yuki directly.
Step 1 - Get your Yuki MCP credentials
In the Yuki platform, go to the Integrations tab, search for Cortex Agent, and click Connect.
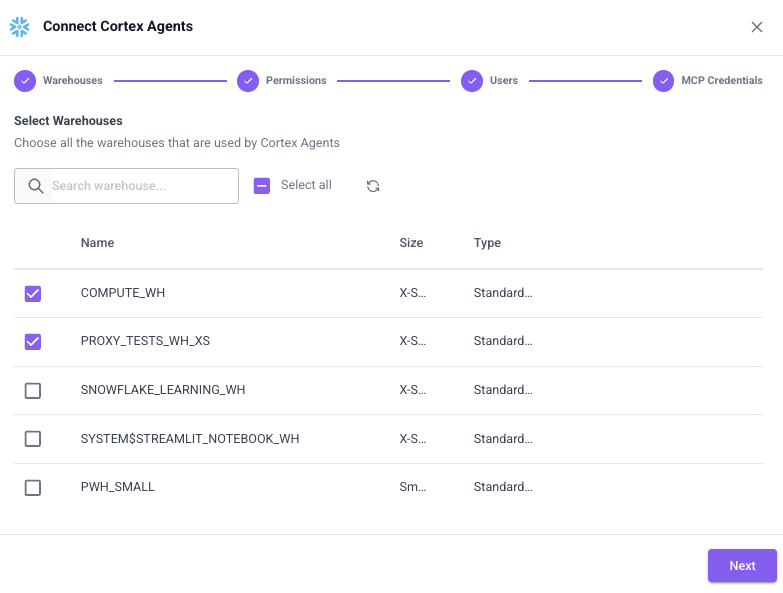
Choose the warehouses you want the MCP to have access to. These are the warehouses that will be available when mapping the connector on the Snowflake side, so users can query them through the Cortex Agent.
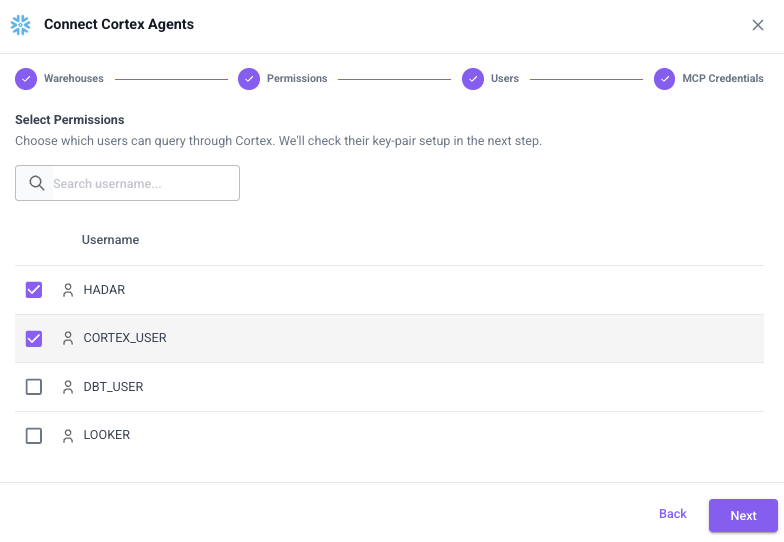
Choose which users can query through Cortex. Yuki checks their key-pair setup in the next step.
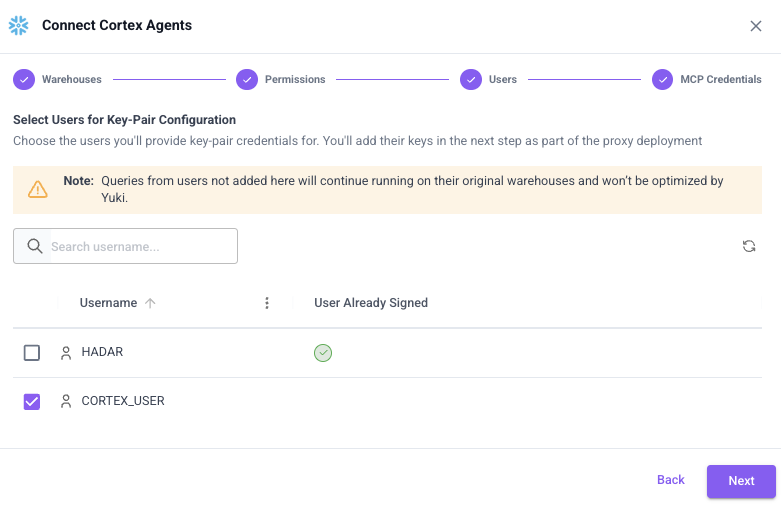
If any selected users are missing a key pair - or you want to rotate an existing one - select them and provide their key pairs.
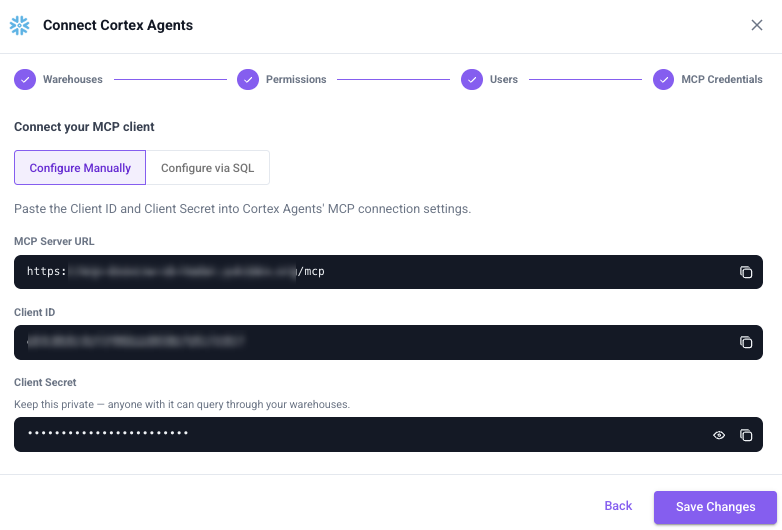
Finally, use the MCP Server URL, Client ID, and Client Secret shown here to configure the connector on the Snowflake side - or choose Configure via SQL to create the connector directly in Snowflake and skip ahead to Step 3.
Step 2 - Add and configure the MCP connector in Snowflake
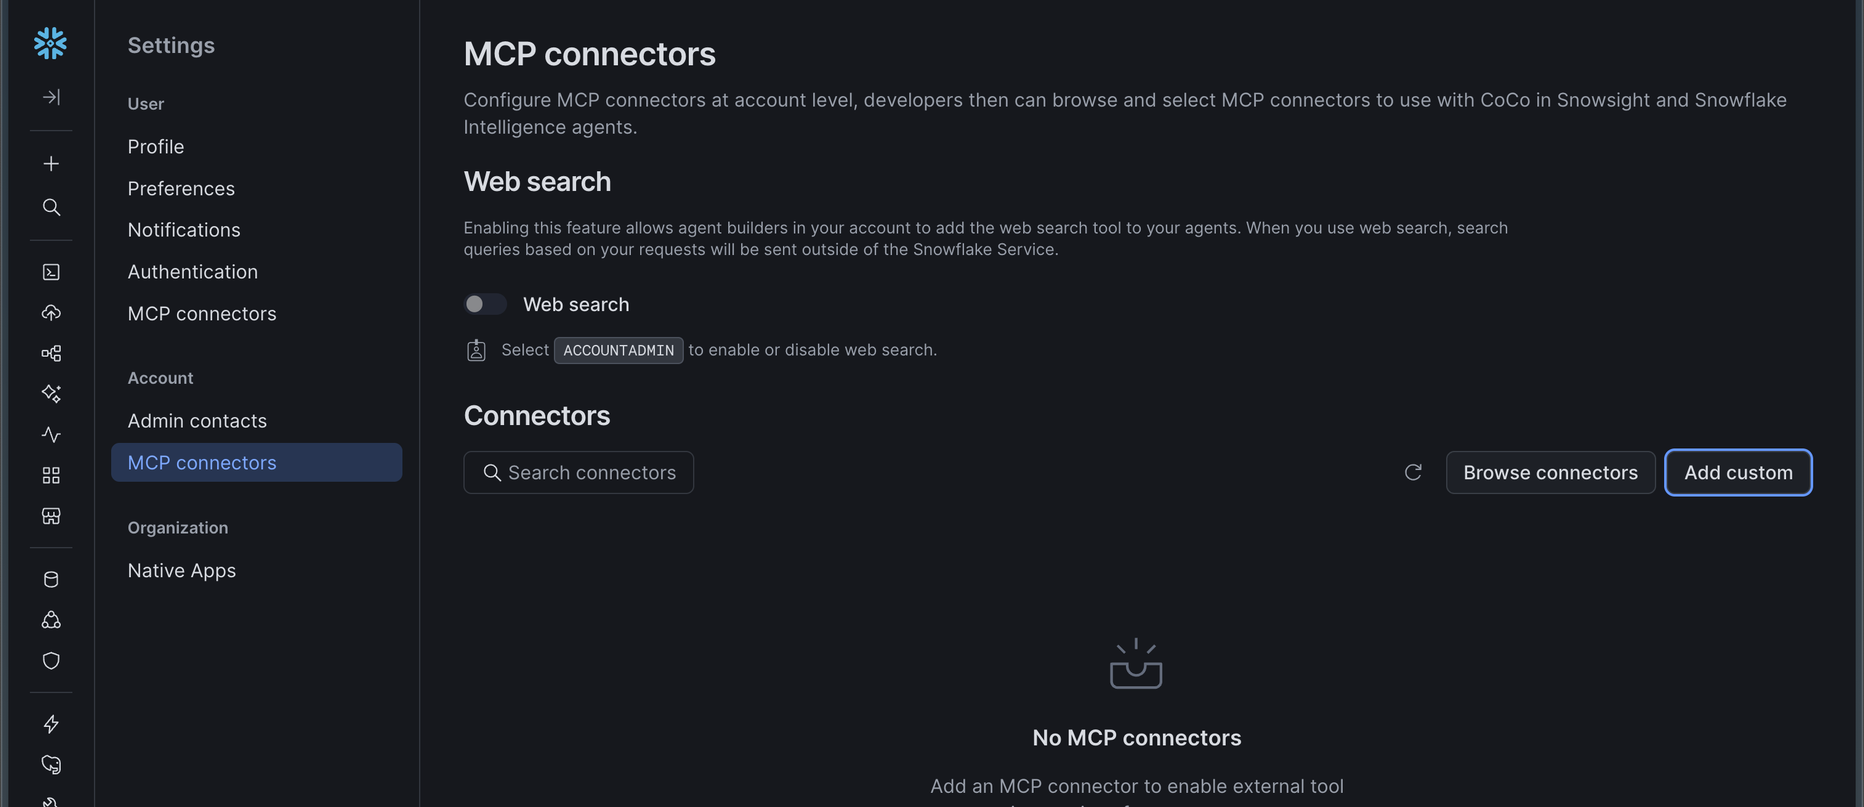
In Snowflake, go to Settings → Account → MCP connectors, then click Add custom.
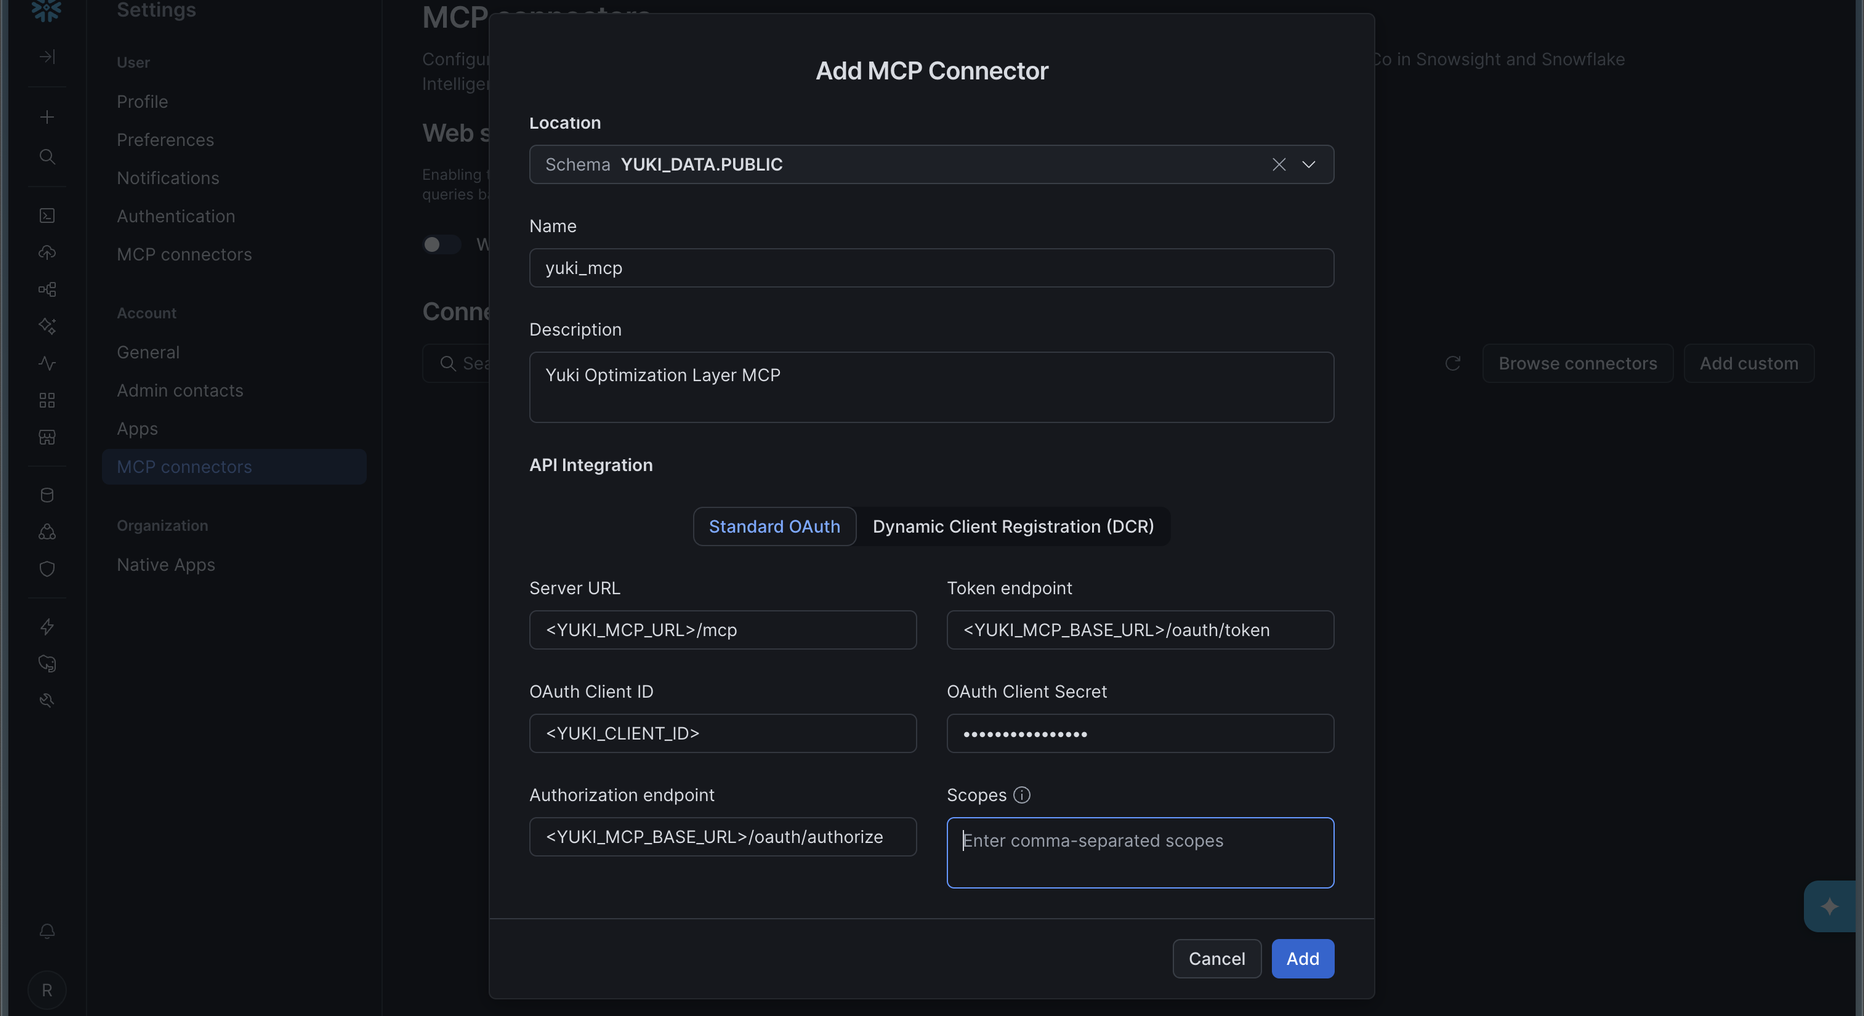
In the Add MCP Connector modal:
- Choose the database/schema location for the connector.
- Give the MCP connector a Name and Description.
- Under API Integration, fill in the Server URL, OAuth Client ID, and OAuth Client Secret from Step 1.
- Fill in the Token endpoint and Authorization endpoint.
- Click Add.
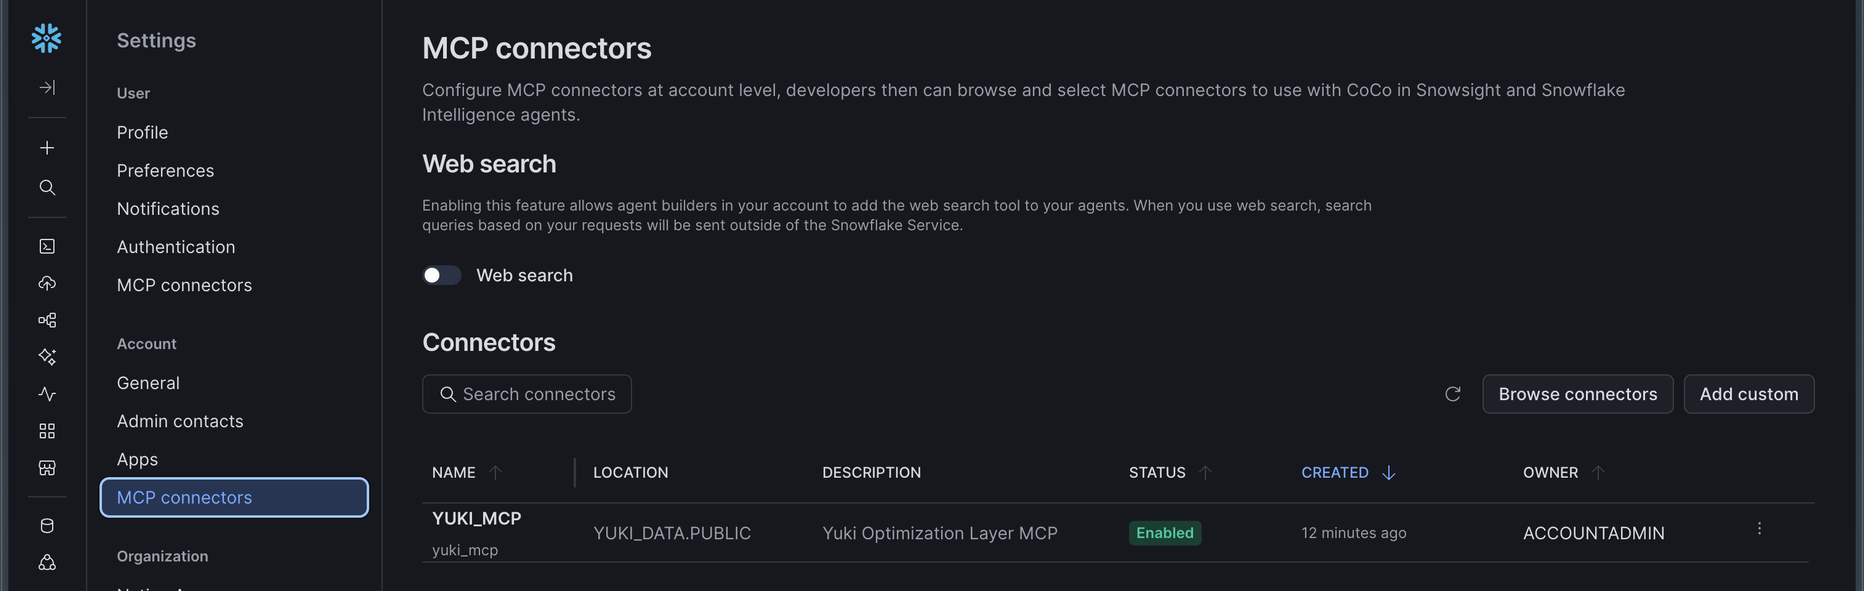
Once added, the connector appears in your account's MCP connectors list as Enabled.
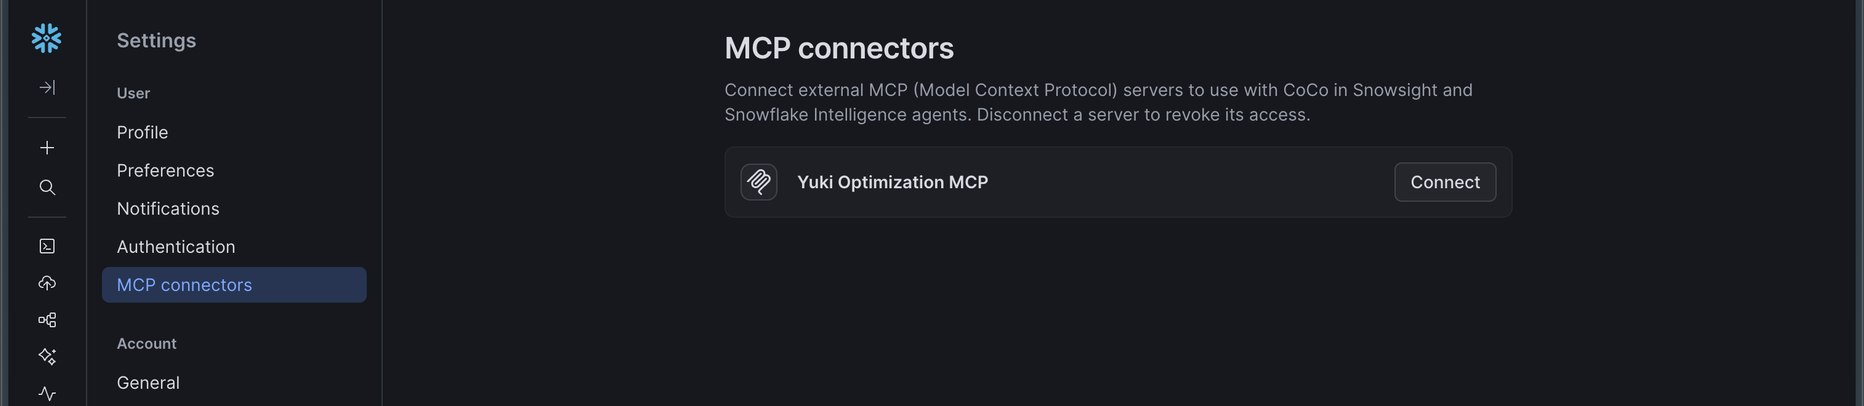
Step 3 - Map the connector to a user
Go to Settings → User → MCP connectors and click Connect next to the Yuki connector.
Choose the Snowflake warehouse and user you want the MCP connection to use, then click Connect.
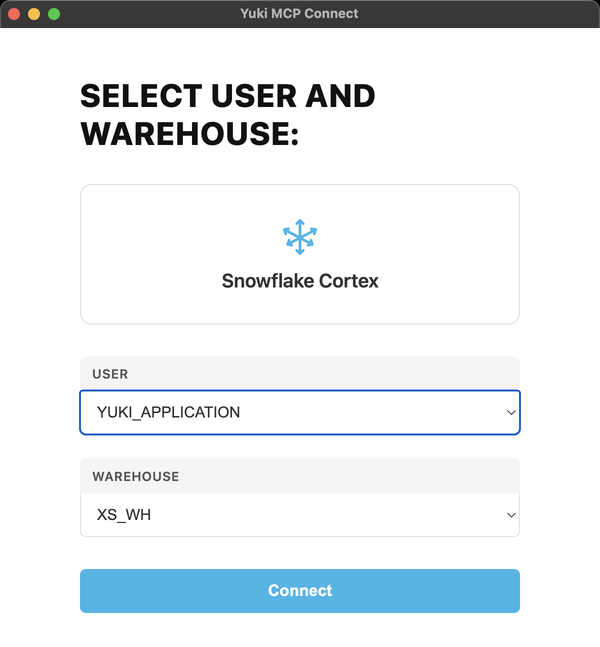
Step 4 - Add the connector to a Cortex Agent
Go to AI & ML → Agents and select the agent you want to connect to the MCP. Under Configuration → MCP, click Add to agent next to the Yuki connector.
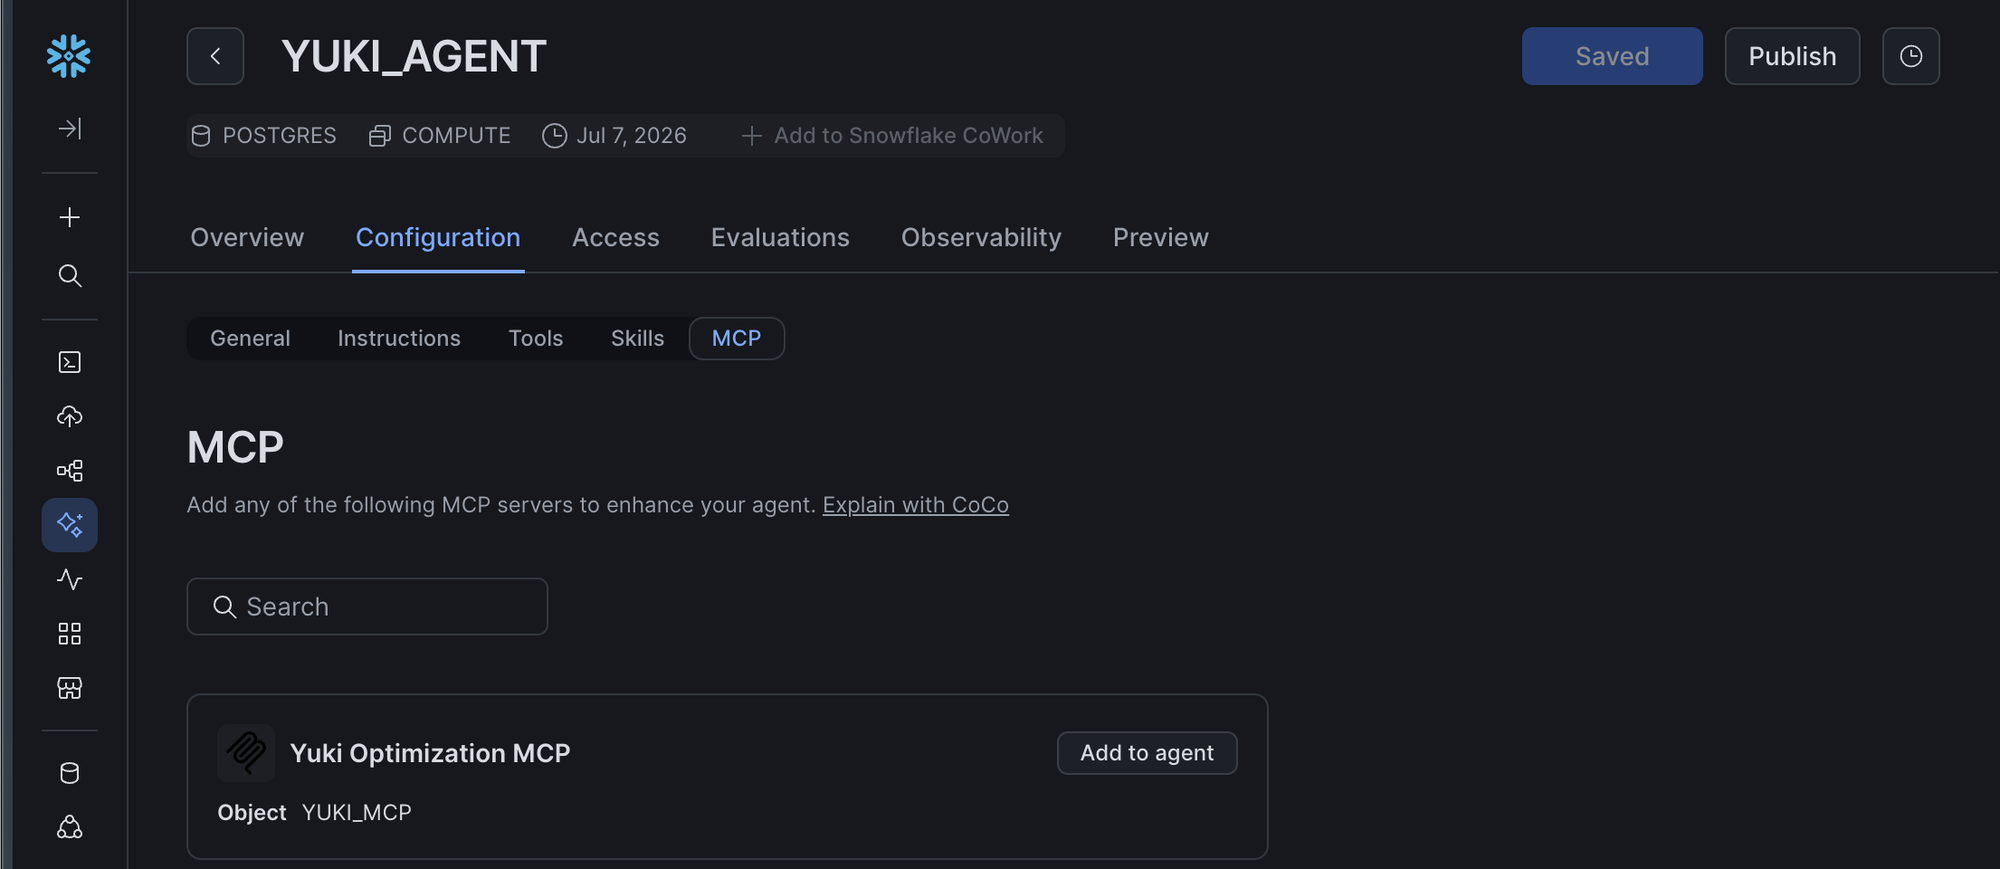
What Happens Next
Your Yuki MCP connector is now connected to the Cortex Agent. The agent can call Yuki's optimization layer as a tool whenever it runs queries against your Snowflake account.