AWS PrivateLink Setup (For Business Critical Accounts)
Complete your Yuki Proxy deployment first (via Fully Hosted, Helm, or Terraform). Use this guide after the proxy is connected if your organization requires that all Yuki–Snowflake communication stays within AWS private networking.
Deployment Architecture Overview
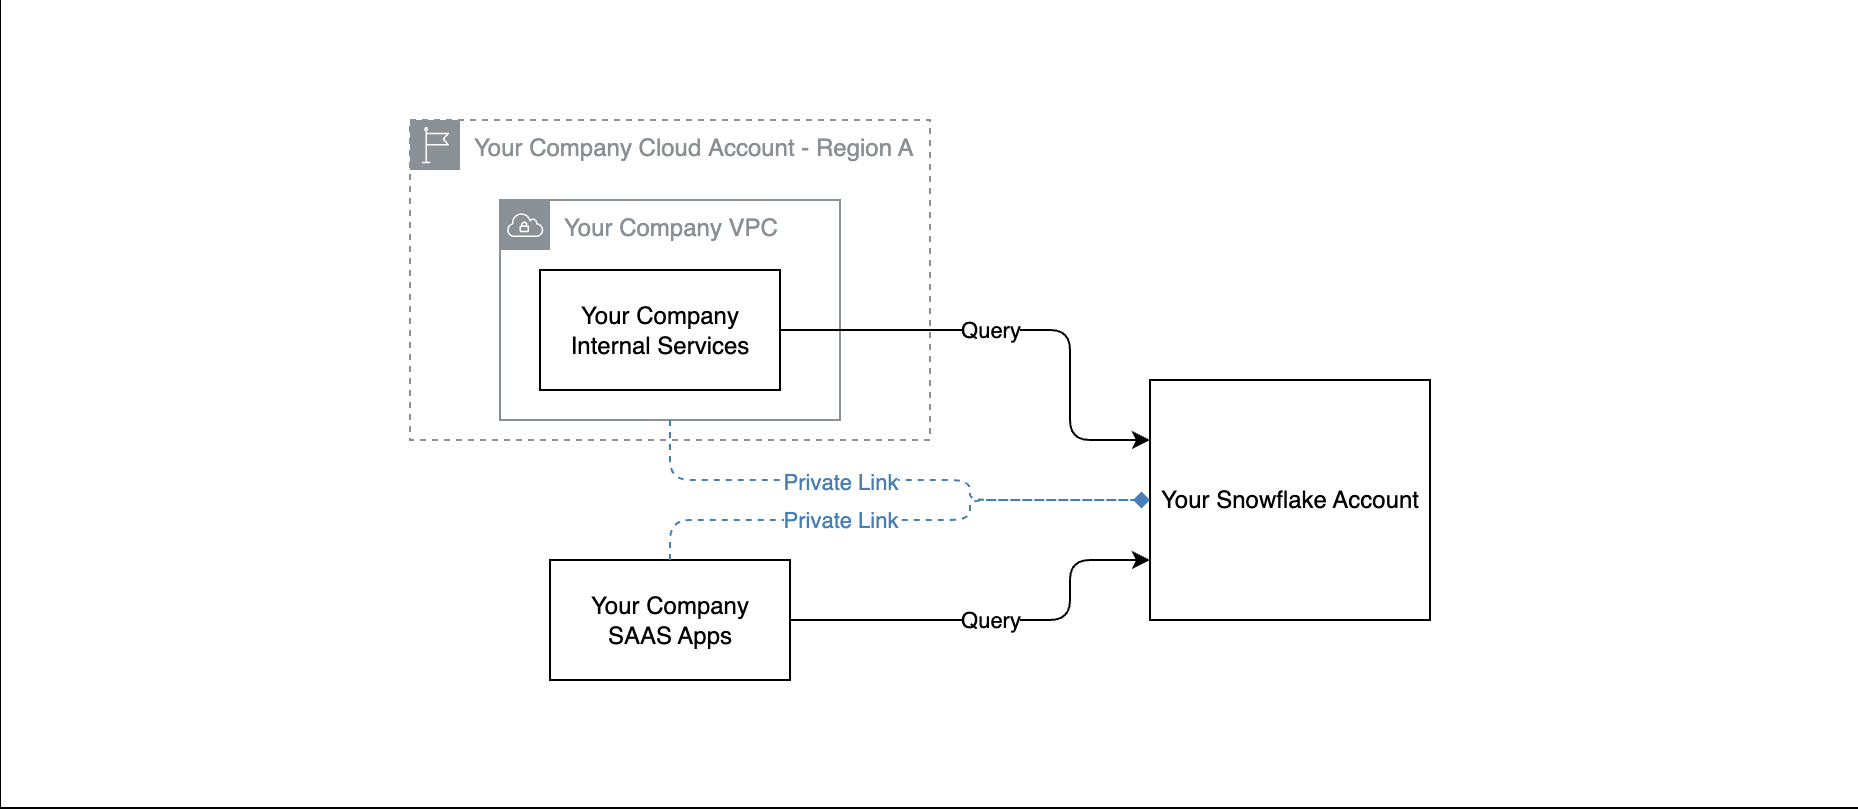
All PrivateLink configurations follow the same core principles: traffic flows privately between your environment, the Yuki Proxy, and Snowflake - without traversing the public internet.
Your existing environment:
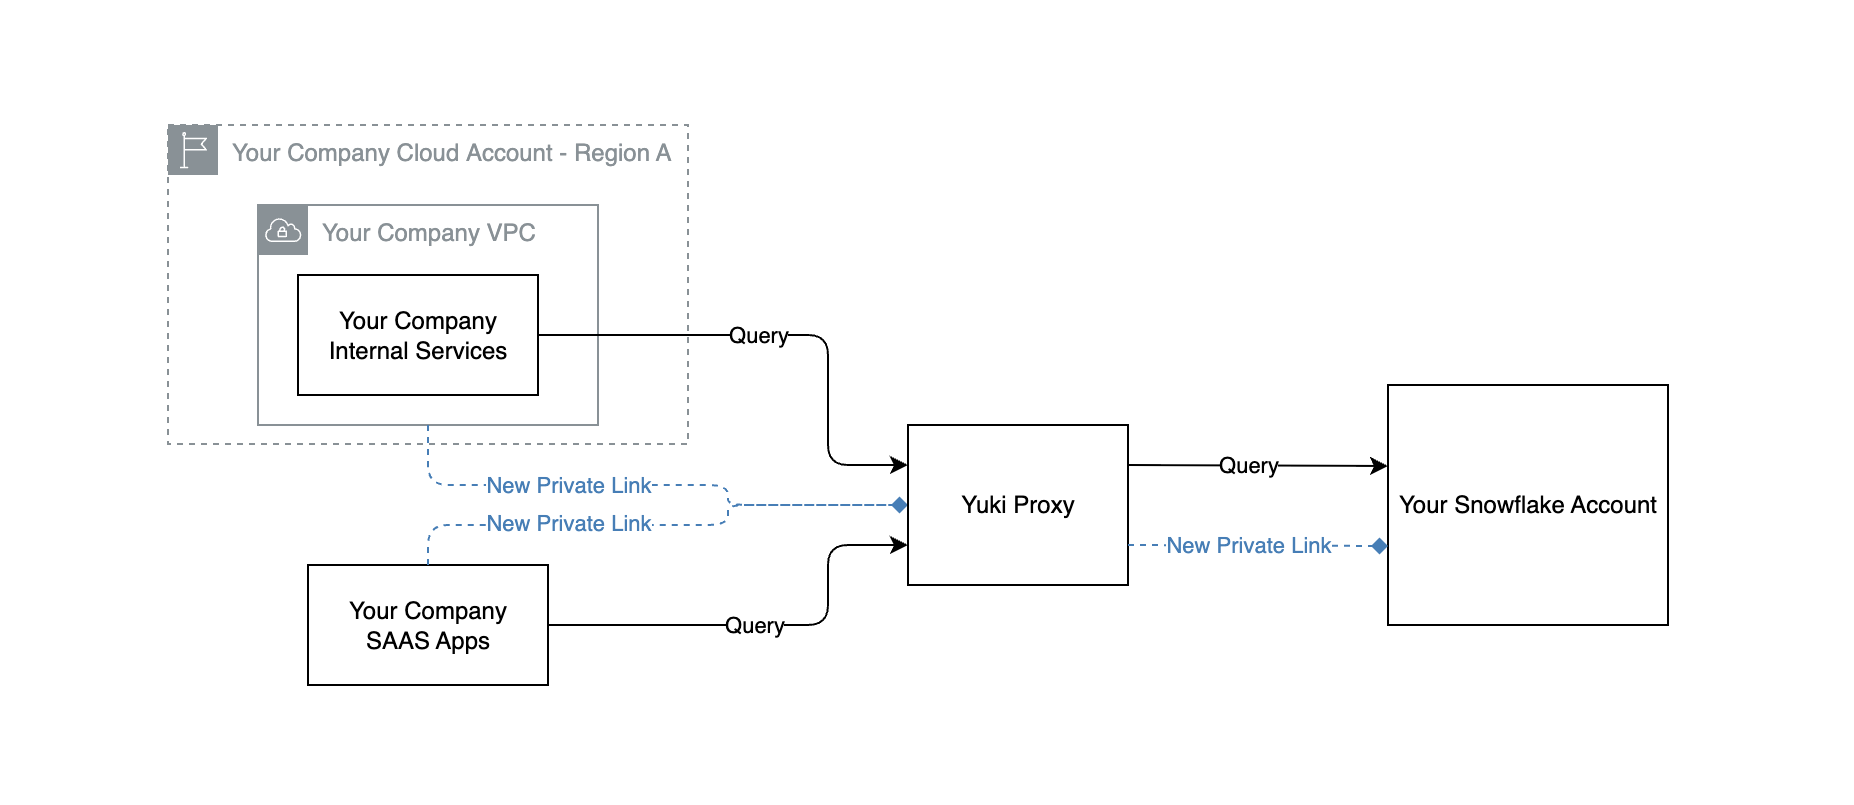
With Yuki - Full Hosted (SaaS):
With Yuki - Same Cluster:
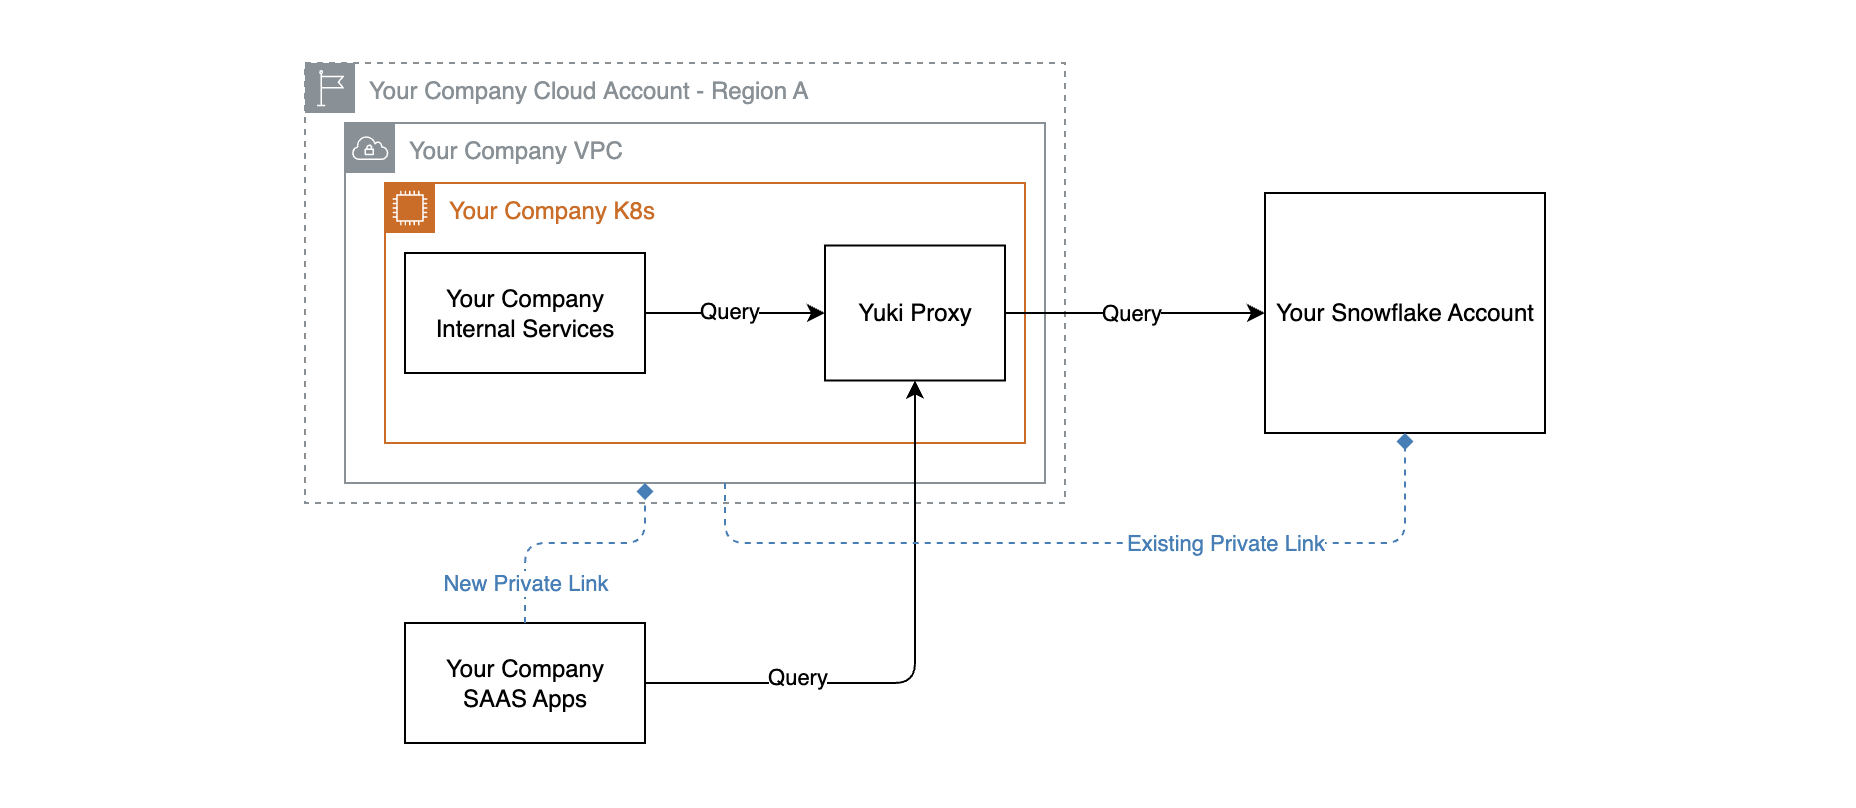
With Yuki - Dedicated VPC:

Requirements
- Snowflake Business Critical edition or higher
- Your Snowflake account and the PrivateLink endpoints must be in the same AWS region
Integration with Snowflake via PrivateLink
- Ask Snowflake Support to enable AWS PrivateLink on your account, providing Yuki's AWS Account ID and your Snowflake account identifier
- Run in Snowflake:
SELECT SYSTEM$GET_PRIVATELINK_CONFIG();
- Share the full JSON output securely with Yuki Support
- Yuki establishes a PrivateLink interface endpoint and validates connectivity
- Yuki provides the PrivateLink host address
- In Yuki, update the Snowflake connection to use the PrivateLink host
Connectivity from Your AWS VPC to Yuki
Prerequisites
- An existing VPC
- Two private subnets across different availability zones
- A security group allowing inbound TCP 443
- VPC DNS hostnames enabled
Steps
- Contact Yuki Support for PrivateLink enablement (provide your AWS account ID)
- Create a VPC Interface Endpoint with private DNS enabled
- Request Yuki approval for the endpoint connection