Service User Authentication
Yuki requires all Snowflake service users (such as dbt_user, bi_user, or application_user) to authenticate using Key Pair Authentication.
You can choose one of two integration options:
- Upload the private key directly into Yuki (stored securely in AWS Secrets Manager)
- Reference an existing key already stored in your own AWS Secrets Manager
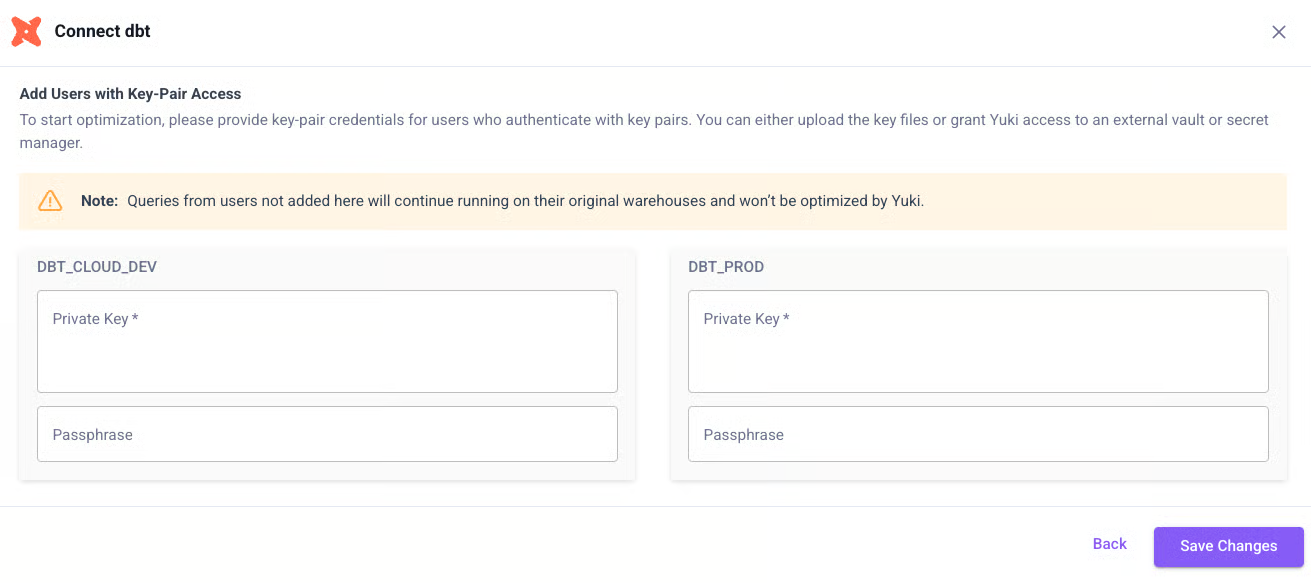
Option 1 - Upload the Key to Yuki
For each service user, provide:
- Username
- Private Key (contents of
private_key.pem) - Passphrase (if used)
Yuki will automatically encrypt and store the key in AWS Secrets Manager.
Option 2 - Reference Key from AWS Secrets Manager
The Snowflake private key remains in your AWS Secrets Manager. A cross-account IAM role is created with read-only access to the specific secret.
Prerequisites
Store your private key in AWS Secrets Manager in this format:
{
  "UserPrivateKey": "-----BEGIN ... KEY-----",
  "PrivateKeyPassphrase": "xxx"
}
Step 1 - Create IAM Role (Trust Policy)
Create a role (e.g., YukiProxyReadKeysRole) with this trust policy:
{
  "Version": "2012-10-17",
  "Statement": [
    {
      "Effect": "Allow",
      "Principal": {
        "AWS": "arn:aws:sts::406122784773:assumed-role/yuki-proxy-secret-access-role/external-secrets-provider-aws"
      },
      "Action": "sts:AssumeRole",
      "Condition": {
        "StringEquals": { "sts:ExternalId": "<EXTERNAL_ID>" }
      }
    }
  ]
}
Step 2 - Attach Permissions
Option A - By ARN:
{
  "Version": "2012-10-17",
  "Statement": [
    {
      "Sid": "ReadSpecificSecret",
      "Effect": "Allow",
      "Action": [
        "secretsmanager:GetSecretValue",
        "secretsmanager:DescribeSecret",
        "kms:Decrypt",
        "kms:DescribeKey"
      ],
      "Resource": "arn:aws:secretsmanager:<region>:<your-account-id>:secret:<your-secret>"
    }
  ]
}
Option B - By Tag (tag secrets with access=yuki-proxy):
{
  "Version": "2012-10-17",
  "Statement": [
    {
      "Sid": "ReadSecretsByTag",
      "Effect": "Allow",
      "Action": [
        "secretsmanager:GetSecretValue",
        "secretsmanager:DescribeSecret",
        "kms:Decrypt",
        "kms:DescribeKey"
      ],
      "Resource": "*",
      "Condition": {
        "StringEquals": { "aws:ResourceTag/access": "yuki-proxy" }
      }
    }
  ]
}
Step 3 - Share Details with Yuki
Provide:
- Role ARN (e.g.,
arn:aws:iam::<your-account-id>:role/YukiProxyReadKeysRole) - ExternalId used in the trust policy
Step 4 - Configure in Yuki UI
Enter: Username, AWS Secret Name, Private Key Property, Passphrase Property, then click Add Authentication.
Next Step
Proceed to Add User-Allowed IPs.