Grant Yuki Access to Your Snowflake Account
This guide explains how to grant Yuki secure, metadata-only access to your Snowflake account. You'll create a dedicated service user, role, and warehouse, and authenticate Yuki using a key pair.
You don't need to run these steps manually - our onboarding wizard will walk you through each step.
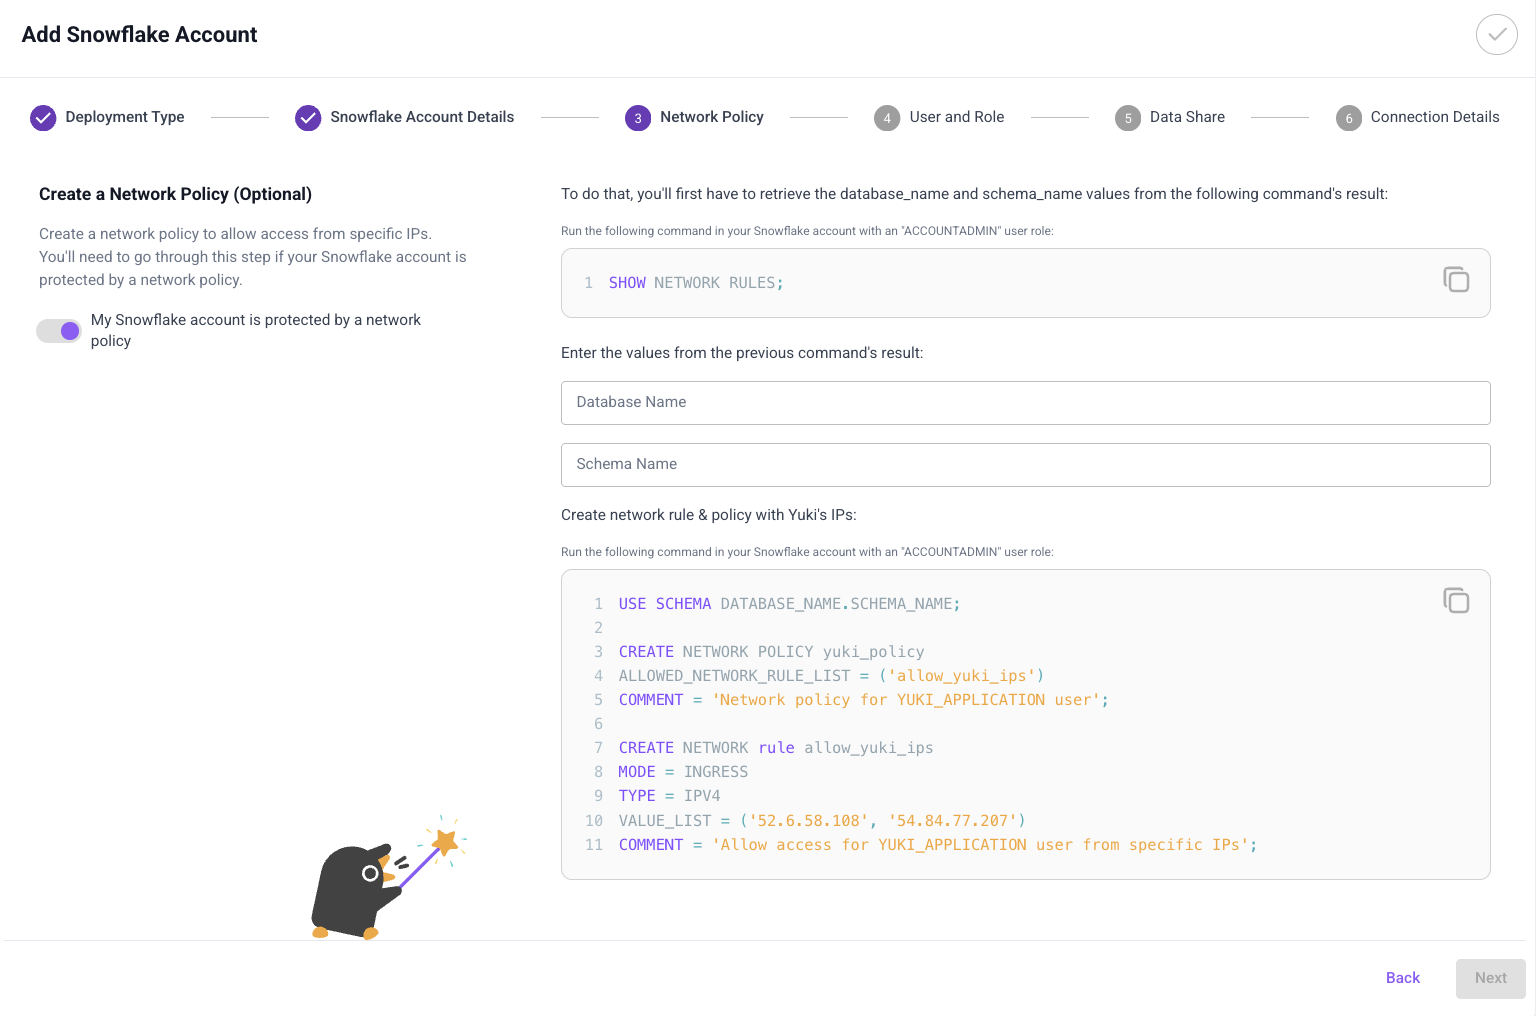
1. Network Policy (Optional)
If your Snowflake account uses a network policy, create one that allows Yuki's IPs:
USE SCHEMA DATABASE_NAME.SCHEMA_NAME;
CREATE NETWORK POLICY yuki_policy
ALLOWED_NETWORK_RULE_LIST = ('allow_yuki_ips')
COMMENT = 'Network policy for YUKI_APPLICATION user';

CREATE NETWORK rule allow_yuki_ips
MODE = INGRESS
TYPE = IPV4
VALUE_LIST = (WAITING FOR IPS FROM BACKEND)
COMMENT = 'Allow access for YUKI_APPLICATION user from specific IPs';
2. Generate Key-Pair
Yuki authenticates to Snowflake using RSA key-pair authentication:
# Generate private key
openssl genrsa -out yuki_snowflake_key.pem 2048

# Extract public key
openssl rsa -in yuki_snowflake_key.pem -pubout -out yuki_snowflake_key.pub
3. Create Yuki Role, Warehouse, and Service User
-- Create a dedicated role for Yuki
CREATE OR REPLACE ROLE yuki_application_role;

-- Create a small service warehouse (auto-suspends after 60s)
CREATE OR REPLACE WAREHOUSE yuki_service_wh
  WAREHOUSE_SIZE = XSMALL
  AUTO_SUSPEND = 60
  INITIALLY_SUSPENDED = TRUE
  COMMENT = 'Yuki application service warehouse';

-- Assign ownership of the warehouse to the role
GRANT OWNERSHIP ON WAREHOUSE yuki_service_wh TO ROLE yuki_application_role;

-- Create the Yuki service user (key pair auth)
CREATE OR REPLACE USER yuki_application
  COMMENT = 'Yuki application user with key pair authentication'
  RSA_PUBLIC_KEY = ''  -- insert public key here
  TYPE = SERVICE
  DEFAULT_ROLE = yuki_application_role
  DEFAULT_WAREHOUSE = yuki_service_wh;

-- Grant the role to the new user and to ACCOUNTADMIN (for visibility)
GRANT ROLE yuki_application_role TO USER yuki_application;
GRANT ROLE yuki_application_role TO ROLE accountadmin;

-- Permissions required by Yuki
GRANT MONITOR USAGE ON ACCOUNT TO ROLE yuki_application_role;
GRANT IMPORTED PRIVILEGES ON DATABASE snowflake TO ROLE yuki_application_role;
GRANT CREATE WAREHOUSE ON ACCOUNT TO ROLE yuki_application_role;
GRANT MANAGE WAREHOUSES ON ACCOUNT TO ROLE yuki_application_role;
GRANT EXECUTE TASK ON ACCOUNT TO ROLE yuki_application_role;
4. Create a Data Share
DROP SHARE IF EXISTS share_queries_with_yuki;
CREATE OR REPLACE DATABASE yuki_data;
GRANT OWNERSHIP ON DATABASE yuki_data TO ROLE yuki_application_role;
GRANT OWNERSHIP ON SCHEMA yuki_data.public TO ROLE yuki_application_role;

CREATE SHARE share_queries_with_yuki;

GRANT USAGE ON DATABASE yuki_data TO SHARE share_queries_with_yuki;
GRANT USAGE ON SCHEMA yuki_data.public TO SHARE share_queries_with_yuki;
-- CREATE Additional PROCEDUREs (in wizard)

ALTER SHARE share_queries_with_yuki ADD ACCOUNTS = <Yuki-Account-Locator>;
-- <Yuki-Account-Locator> is provided in the wizard
5. Snowflake Account Details
Enter the following in the Yuki onboarding wizard and verify the connection test passes:
- Account Identifier, Cloud Provider, Region, Edition
- Cost per Snowflake Credit
- User, Role, and Private Key

Yuki receives metadata-only access via ACCOUNT_USAGE and INFORMATION_SCHEMA. It never reads query text, table contents, or customer data.
Next Step
Proceed to Add Integrations to define which tools and warehouses Yuki will optimize.